Quick Answer: Why Is My Electric Oven Not Heating?
An electric oven not heating is most often caused by a half-tripped 240-volt double-pole circuit breaker, a burned-out bake element, or a failed oven temperature sensor. Electric ovens rely on two separate 120V power legs to reach 240V for heating, while the clock and digital display run on just one 120V leg—which is why your control panel can light up normally even when the heating circuit is completely dead. Before you spend $200+ on an appliance technician, run through this five-minute triage to pinpoint the exact fault and verify whether you need a simple reset or an affordable replacement part.
Safety Alert (240V High-Voltage Hazard): Switching the oven dial or touchpad to “Off” does not disconnect electrical power. Before touching any internal panel, heating element, or wire terminal, flip the dedicated double-pole oven breaker completely OFF at your main electrical panel (or unplug the 240V range cord from the wall). Confirm power is dead by verifying the oven clock is blank and testing terminals with a non-contact voltage tester. Never perform live-voltage testing inside an open appliance cabinet. If you smell burning plastic, see scorched wiring, or notice tripped breakers that immediately trip again, stop and call a licensed electrician.
Step 1: Rule Out Control Settings and Lockouts
Before grabbing tools or ordering parts, start with a quick physical sanity check of the control panel. Modern ranges have safety and convenience features that mimic a broken oven.
Confirm the oven is set to standard bake rather than Delay Start, Keep Warm.
Check the display for a padlock icon, LOC, or DEMO indicator. Demo mode lets the lights and buttons work without energizing the heating elements.
Consult your model-specific owner’s manual to cancel any active lockout or demo sequence rather than mashing random button combinations.
Verification: The display shows a normal bake temperature with no lockout, delay, or demo icons active.
Step 2: Reset the Double-Pole 240V Breaker
If your clock works but neither bake nor broil produces heat, you likely have a tripped half-leg on your 240V circuit. When one side of a double-pole breaker trips, the handle often sits slightly off-center and looks “on” at a glance.
Turn all oven controls to Off.
Locate the clearly labeled double-pole oven breaker (usually 40A or 50A) in your dry, accessible breaker panel.
Push the breaker handle firmly all the way to OFF until it clicks, wait 30 seconds, then snap it firmly back to ON.
Do this only once. If the breaker snaps right back to off, leave it off—you have a dead short in the oven or household wiring that requires professional service.
Verification: The double-pole breaker stays firmly latched in the ON position without tripping.
Step 3: Visually Inspect the Bake and Broil Elements
When you have an electric oven not heating on bake but the top broil element still glows red, the lower bake element is your prime suspect.
Ensure the oven is completely cool and the 240V breaker is switched OFF.
Open the oven door and shine a bright flashlight along the entire length of the exposed lower bake element and upper broil element.
Look closely for dark blisters, pitted bubbles, hairline cracks, or a visible burn-through spot.
Technician Tip: Pay extra attention to the rear bends near the mounting bracket. Elements expand and contract hundreds of times a year, and fatigue cracks almost always form right at the back corners.
Verification: You either spot visible blistering/breaks (confirming a failed element) or the metal sheath looks completely smooth and intact.
Step 4: Continuity Testing With a Digital Multimeter
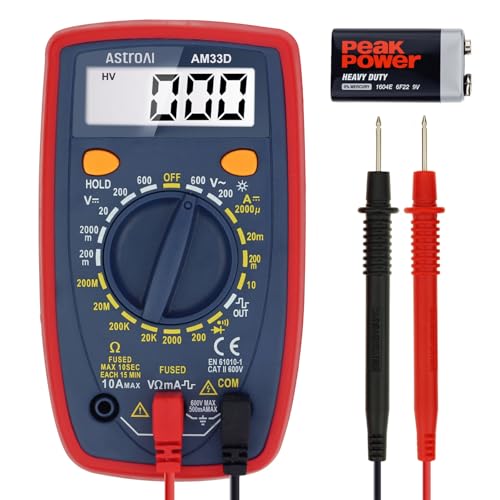
A heating element can look completely intact on the outside while its internal resistance wire is snapped in half. Dead-testing with a multimeter removes all guesswork so you don’t buy parts you don’t need.
Essential for dead-testing oven bake elements, thermal fuses, and temperature sensors for continuity and ohms without guessing.
Affiliate Disclosure: As an Amazon Associate, FrugalFix earns from qualifying purchases. Prices & availability accurate as of retrieval.
How to Diagnose an Electric Oven Not Heating With a Multimeter
With the 240V breaker OFF, use a 1/4-inch nut driver to remove the two mounting screws holding the bake element bracket to the rear oven wall.
Gently pull the element forward about 2 to 3 inches until the two rear wire terminals clear the wall.
Technician Tip: Never let the detached wire leads slip back through the hole into the rear insulation—clip a clothespin or wrap a piece of masking tape around the wires before pulling them off the spade terminals.
Set your digital multimeter to the lowest Ohms (Ω) or continuity setting.
Touch one meter probe to each metal terminal on the disconnected element. Check your model’s OEM tech sheet (usually tucked inside a plastic pouch taped to the back panel or under the warming drawer) for exact resistance specs. Most healthy bake elements read a low, steady resistance (typically between 15 and 40 ohms), while a blown element reads OL (open loop/infinite resistance).
Verification: The multimeter displays a steady resistance reading matching your OEM tech sheet or displays OL confirming an open circuit.
If your bake element shows OL or visible blistering, replace it using your exact oven model number (found on the frame inside the door or warming drawer).
Verify your exact range model number before ordering to ensure proper wattage, mounting bracket alignment, and terminal spacing.
Affiliate Disclosure: As an Amazon Associate, FrugalFix earns from qualifying purchases. Prices & availability accurate as of retrieval.
Step 5: Check the Oven Temperature Sensor and Thermal Fuse
If both elements test good and your 240V supply is solid, an electric oven not heating usually points to a failed temperature sensor or a tripped high-limit thermal fuse.
Locate the thin metal oven temperature sensor probe sticking out of the upper rear corner inside the oven cavity.
Remove its two 1/4-inch mounting screws, pull the probe gently forward, and unplug its small plastic wire harness.
Set your multimeter to 2000 ohms (Ω) and test across the two pins in the sensor plug. Per standard Whirlpool, GE, and Frigidaire OEM service manuals, a room-temperature (70°F) sensor should read roughly 1,080 to 1,100 ohms. If it reads OL or wildly off-spec, replace the sensor.
If the sensor is good, access the rear panel (power still OFF) and test the thermal fuse for continuity. A blown thermal fuse reads OL and cuts power to the heating circuit after an overheating event (often right after a self-clean cycle). Never bypass a thermal fuse—always replace it with an exact OEM match.
Verification: The temperature sensor reads near 1,080–1,100 ohms at room temperature, and the thermal fuse shows near-zero ohms (continuous).
Need help with other range issues, or working on a gas model instead? Browse our complete FrugalFix DIY Oven Repair Hub for step-by-step guides on gas igniters, error codes, and uneven baking.
Tools & Parts Diagnostic Matrix
Component
Normal Multimeter Reading
Failed Reading
Recommended Action
240V Double-Pole Breaker
Latched firmly ON
Trips immediately or sits loose
Reset once; call an electrician if it trips again
Bake / Broil Element
Steady low ohms (check OEM tech sheet)
OL (Open Loop) or visible blisters
Replace the element with a model-specific part
Oven Temperature Sensor
~1,080–1,100 Ω at 70°F
OL or far outside OEM spec
Replace the temperature sensor
High-Limit Thermal Fuse
0–1 Ω (Continuous)
OL (Open Loop)
Replace the fuse; inspect for cooling fan blockage
Frequently Asked Questions
Why does my electric oven display work, but the oven won’t heat?
Your oven’s control board, clock, and interior light only require 120 volts to operate, while the bake and broil elements require a full 240 volts. If one leg of your double-pole circuit breaker trips, the display stays lit while the heating elements stay cold.
Can I reset my electric oven by turning off the breaker?
Yes, flipping the dedicated double-pole breaker completely off for 60 seconds and back on performs a hard reset on the electronic control board and clears a half-tripped breaker. Only attempt this reset once; if the breaker trips again, stop and contact a qualified electrician.
Should I replace a hidden bake element myself?
If your oven has a hidden bake element located beneath the oven floor, you can still replace it with the power isolated, though it requires removing the bottom access panel or rear cover depending on the brand. Check your OEM service manual first—if accessing it requires dismantling complex gas/dual-fuel manifolds or you aren’t comfortable isolating 240V power, hire an appliance technician.